Lesson One: Simulated Dig
The unit opens with an introduction to the field of archaeology and a hands-on simulation of an archaeological dig. After viewing Faith Haney's video, "What is Archaeology?" students will work in teams to “unearth” artifacts from two different time periods. The simulated dig will give students a chance to experience how archaeologists collect and catalog artifacts and make interpretations based on what they have found.
This is the only unit activity that requires teacher prep time. If available, you could have classroom helpers (volunteers or older students) cut out the "artifacts."
Goals/Objectives:
Students will investigate ways archaeologists and historians learn about the past.
Students will analyze artifacts.
Students will make interpretations about the lives of the people the artifacts represent.
Standards:
NCHS History Standard 7A:
Materials:
Video note-taking page
For boxes:
Small rectangular boxes - shoebox, or similar (one per team of four students)
Different colored tissue paper (tan, brown, black) or construction/butcher block paper
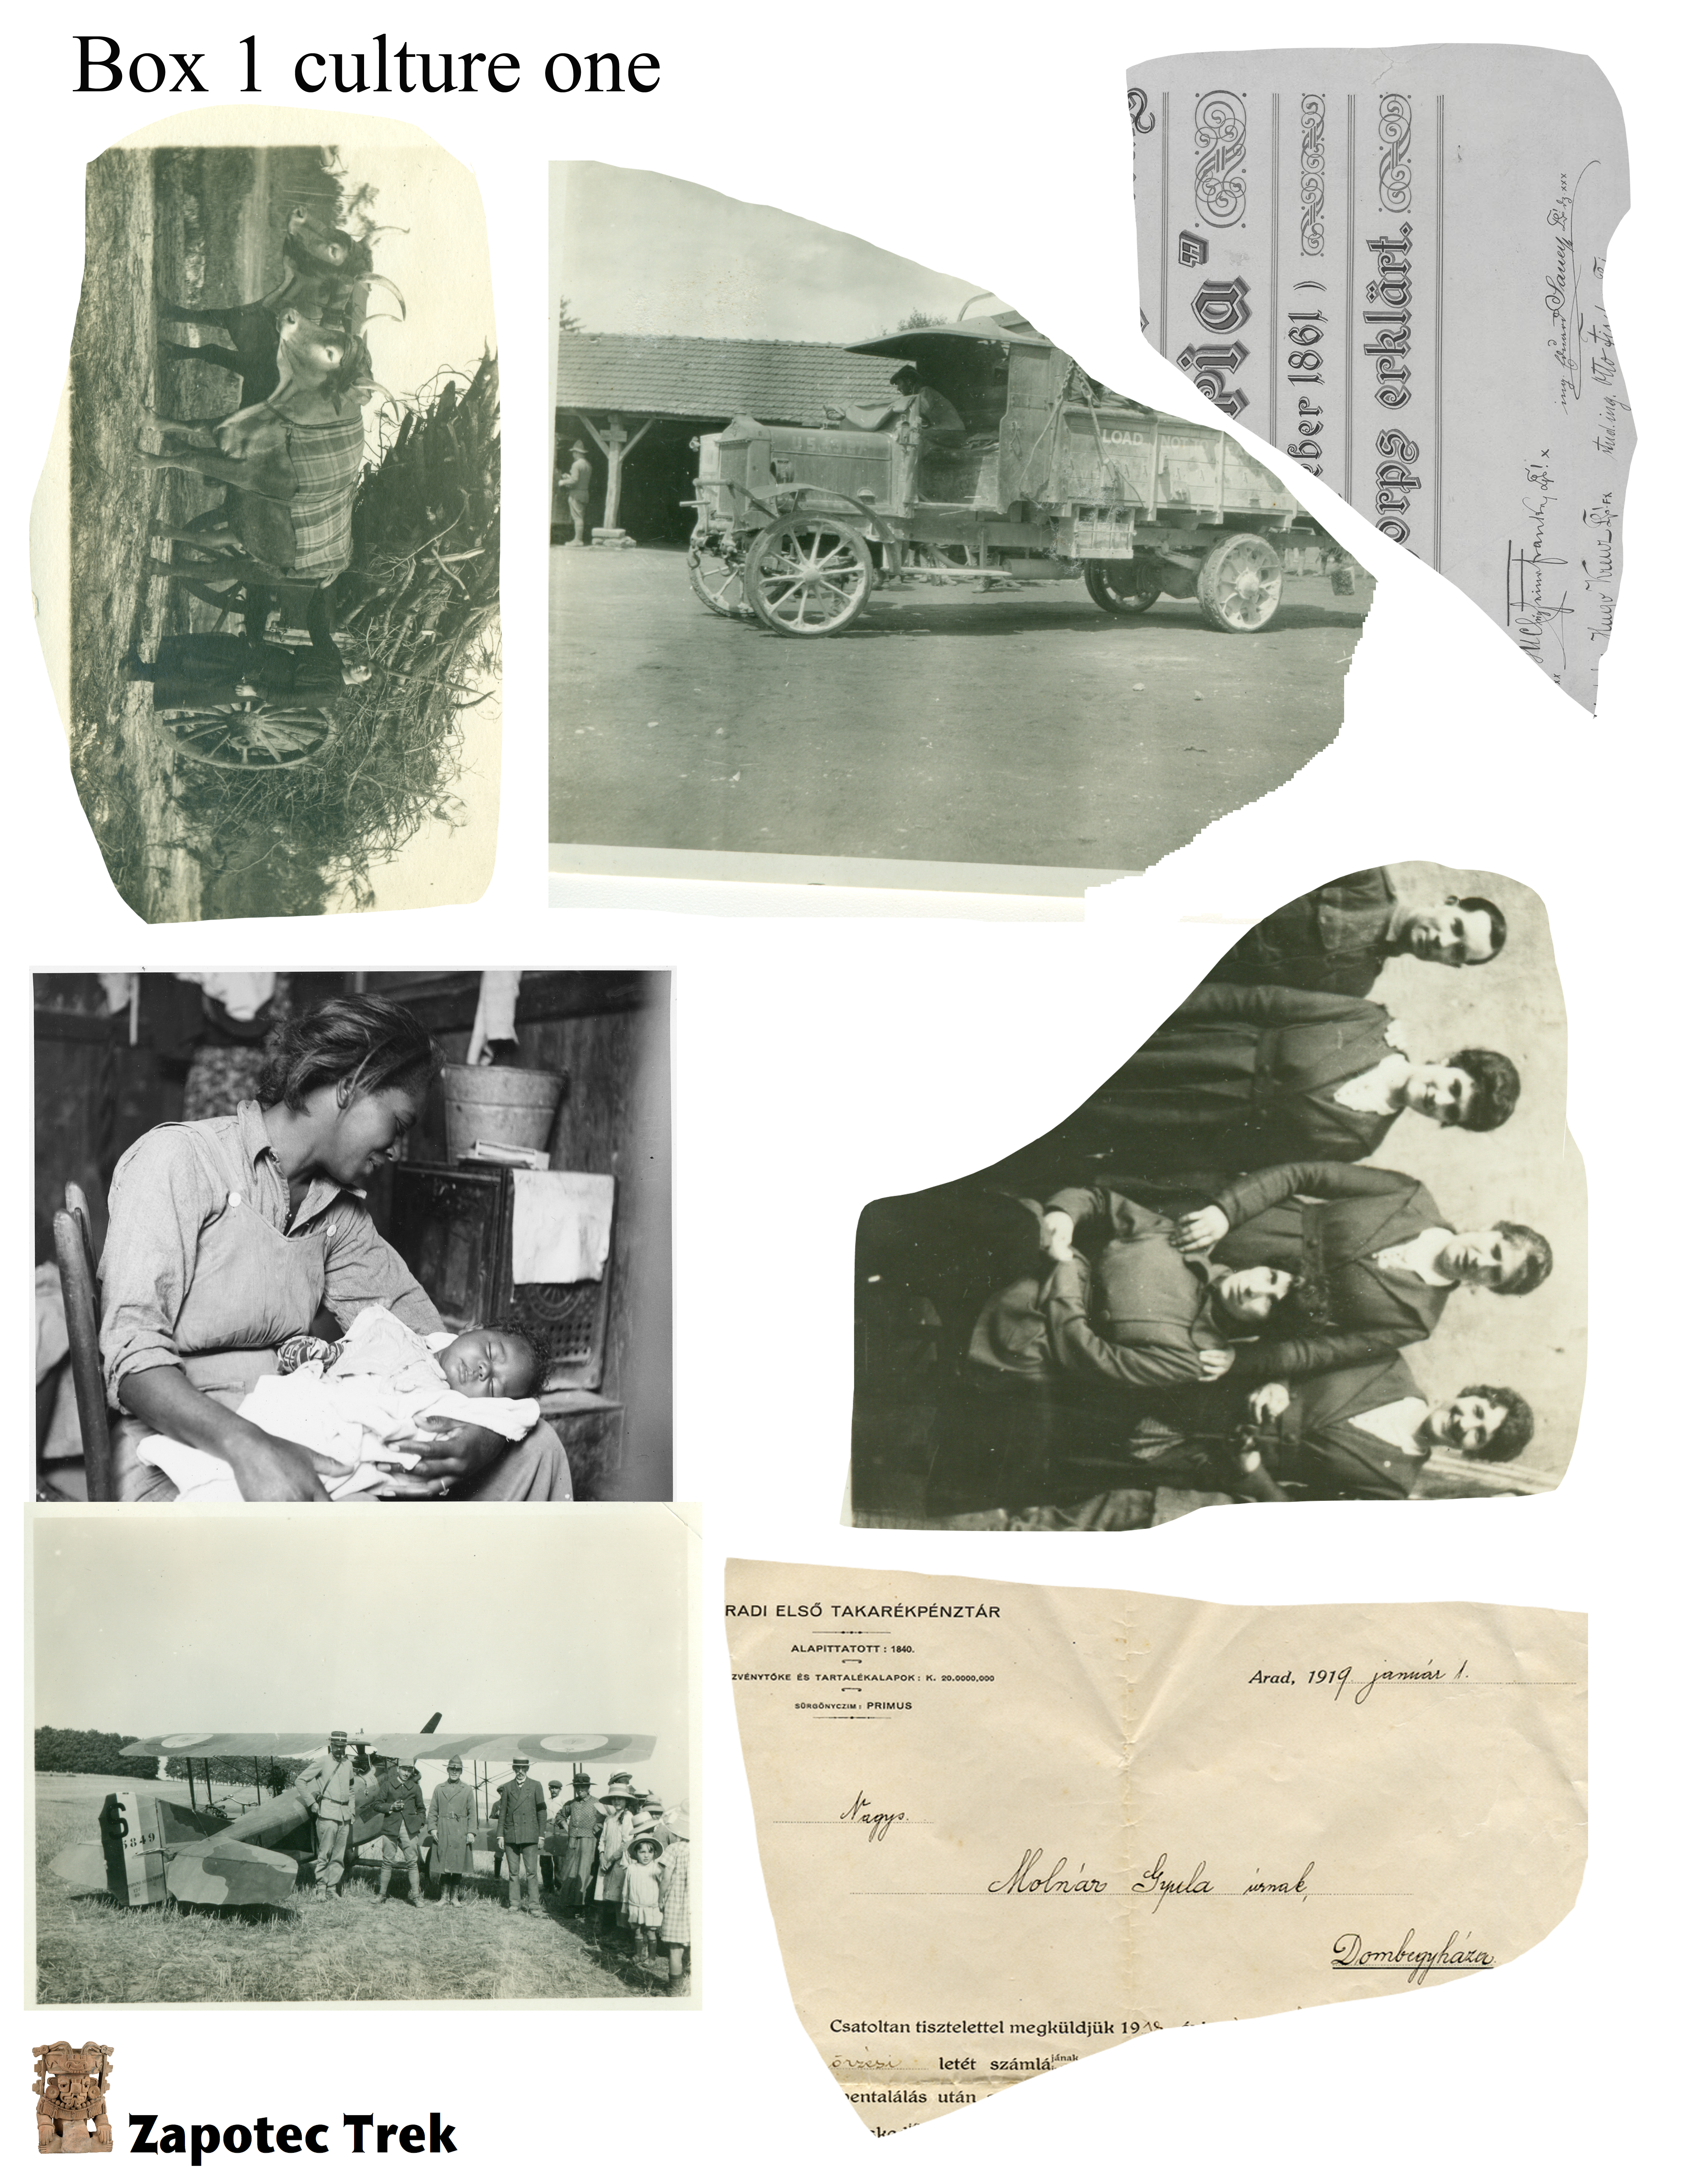
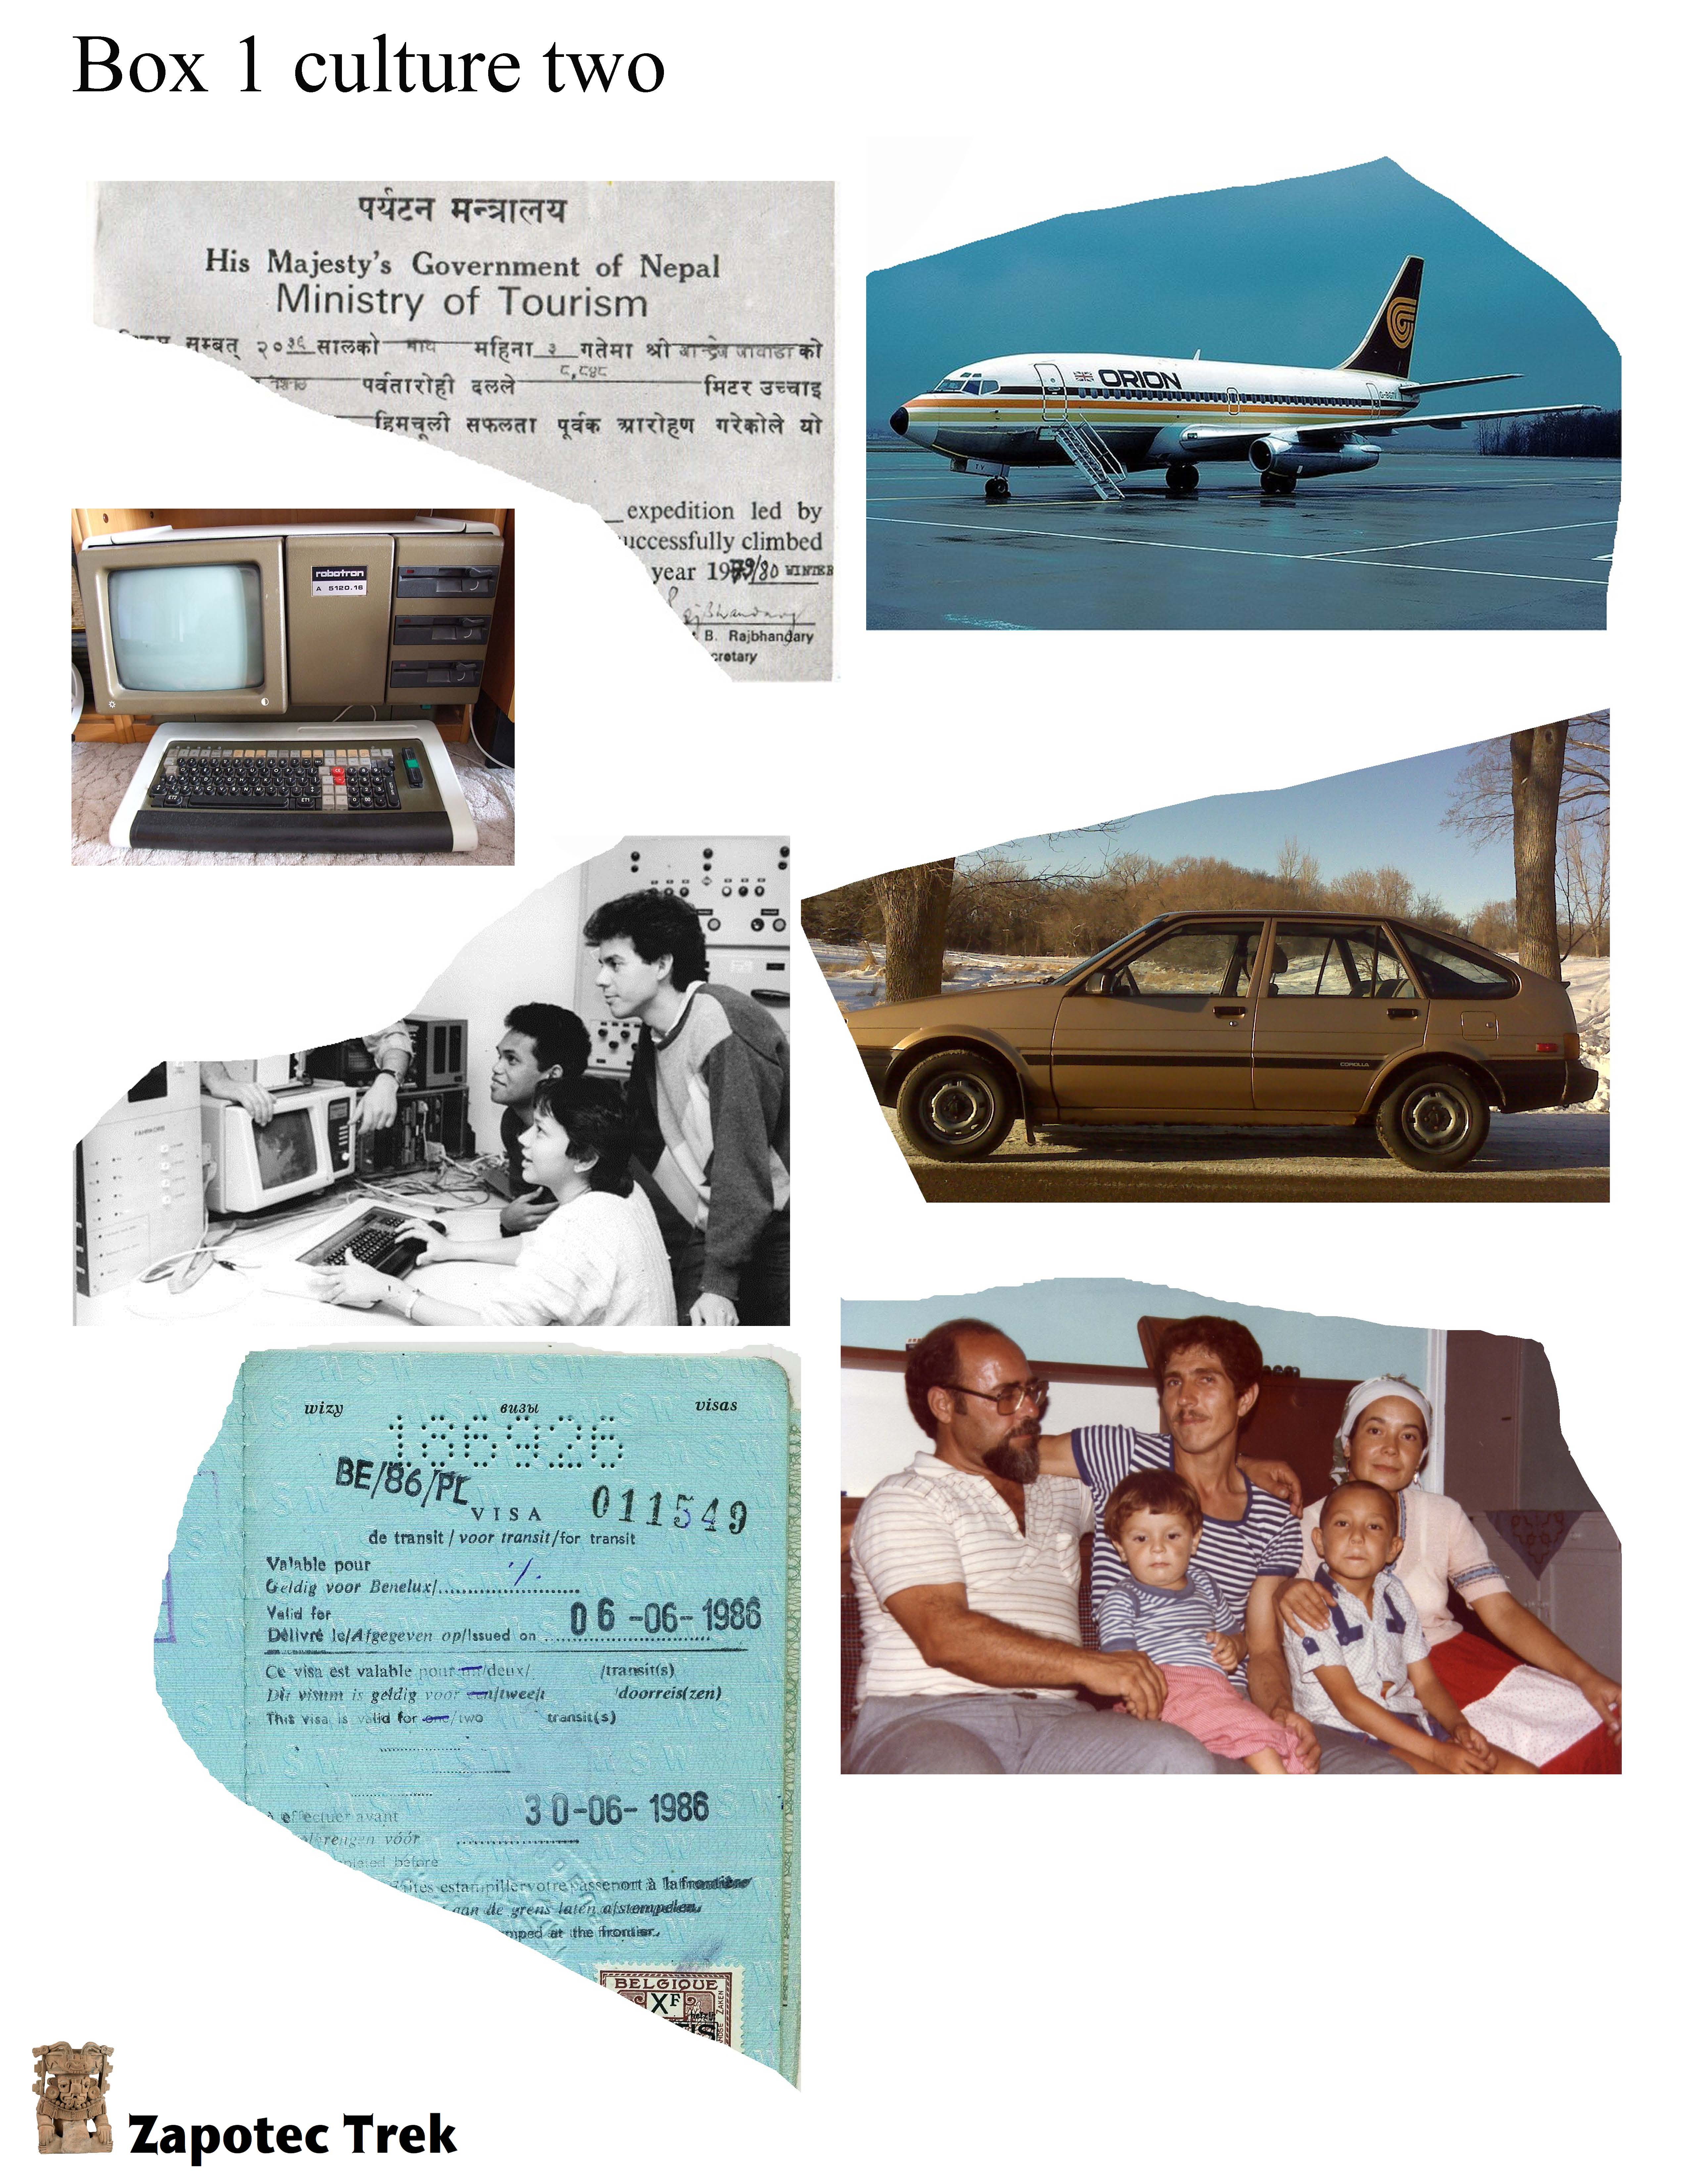
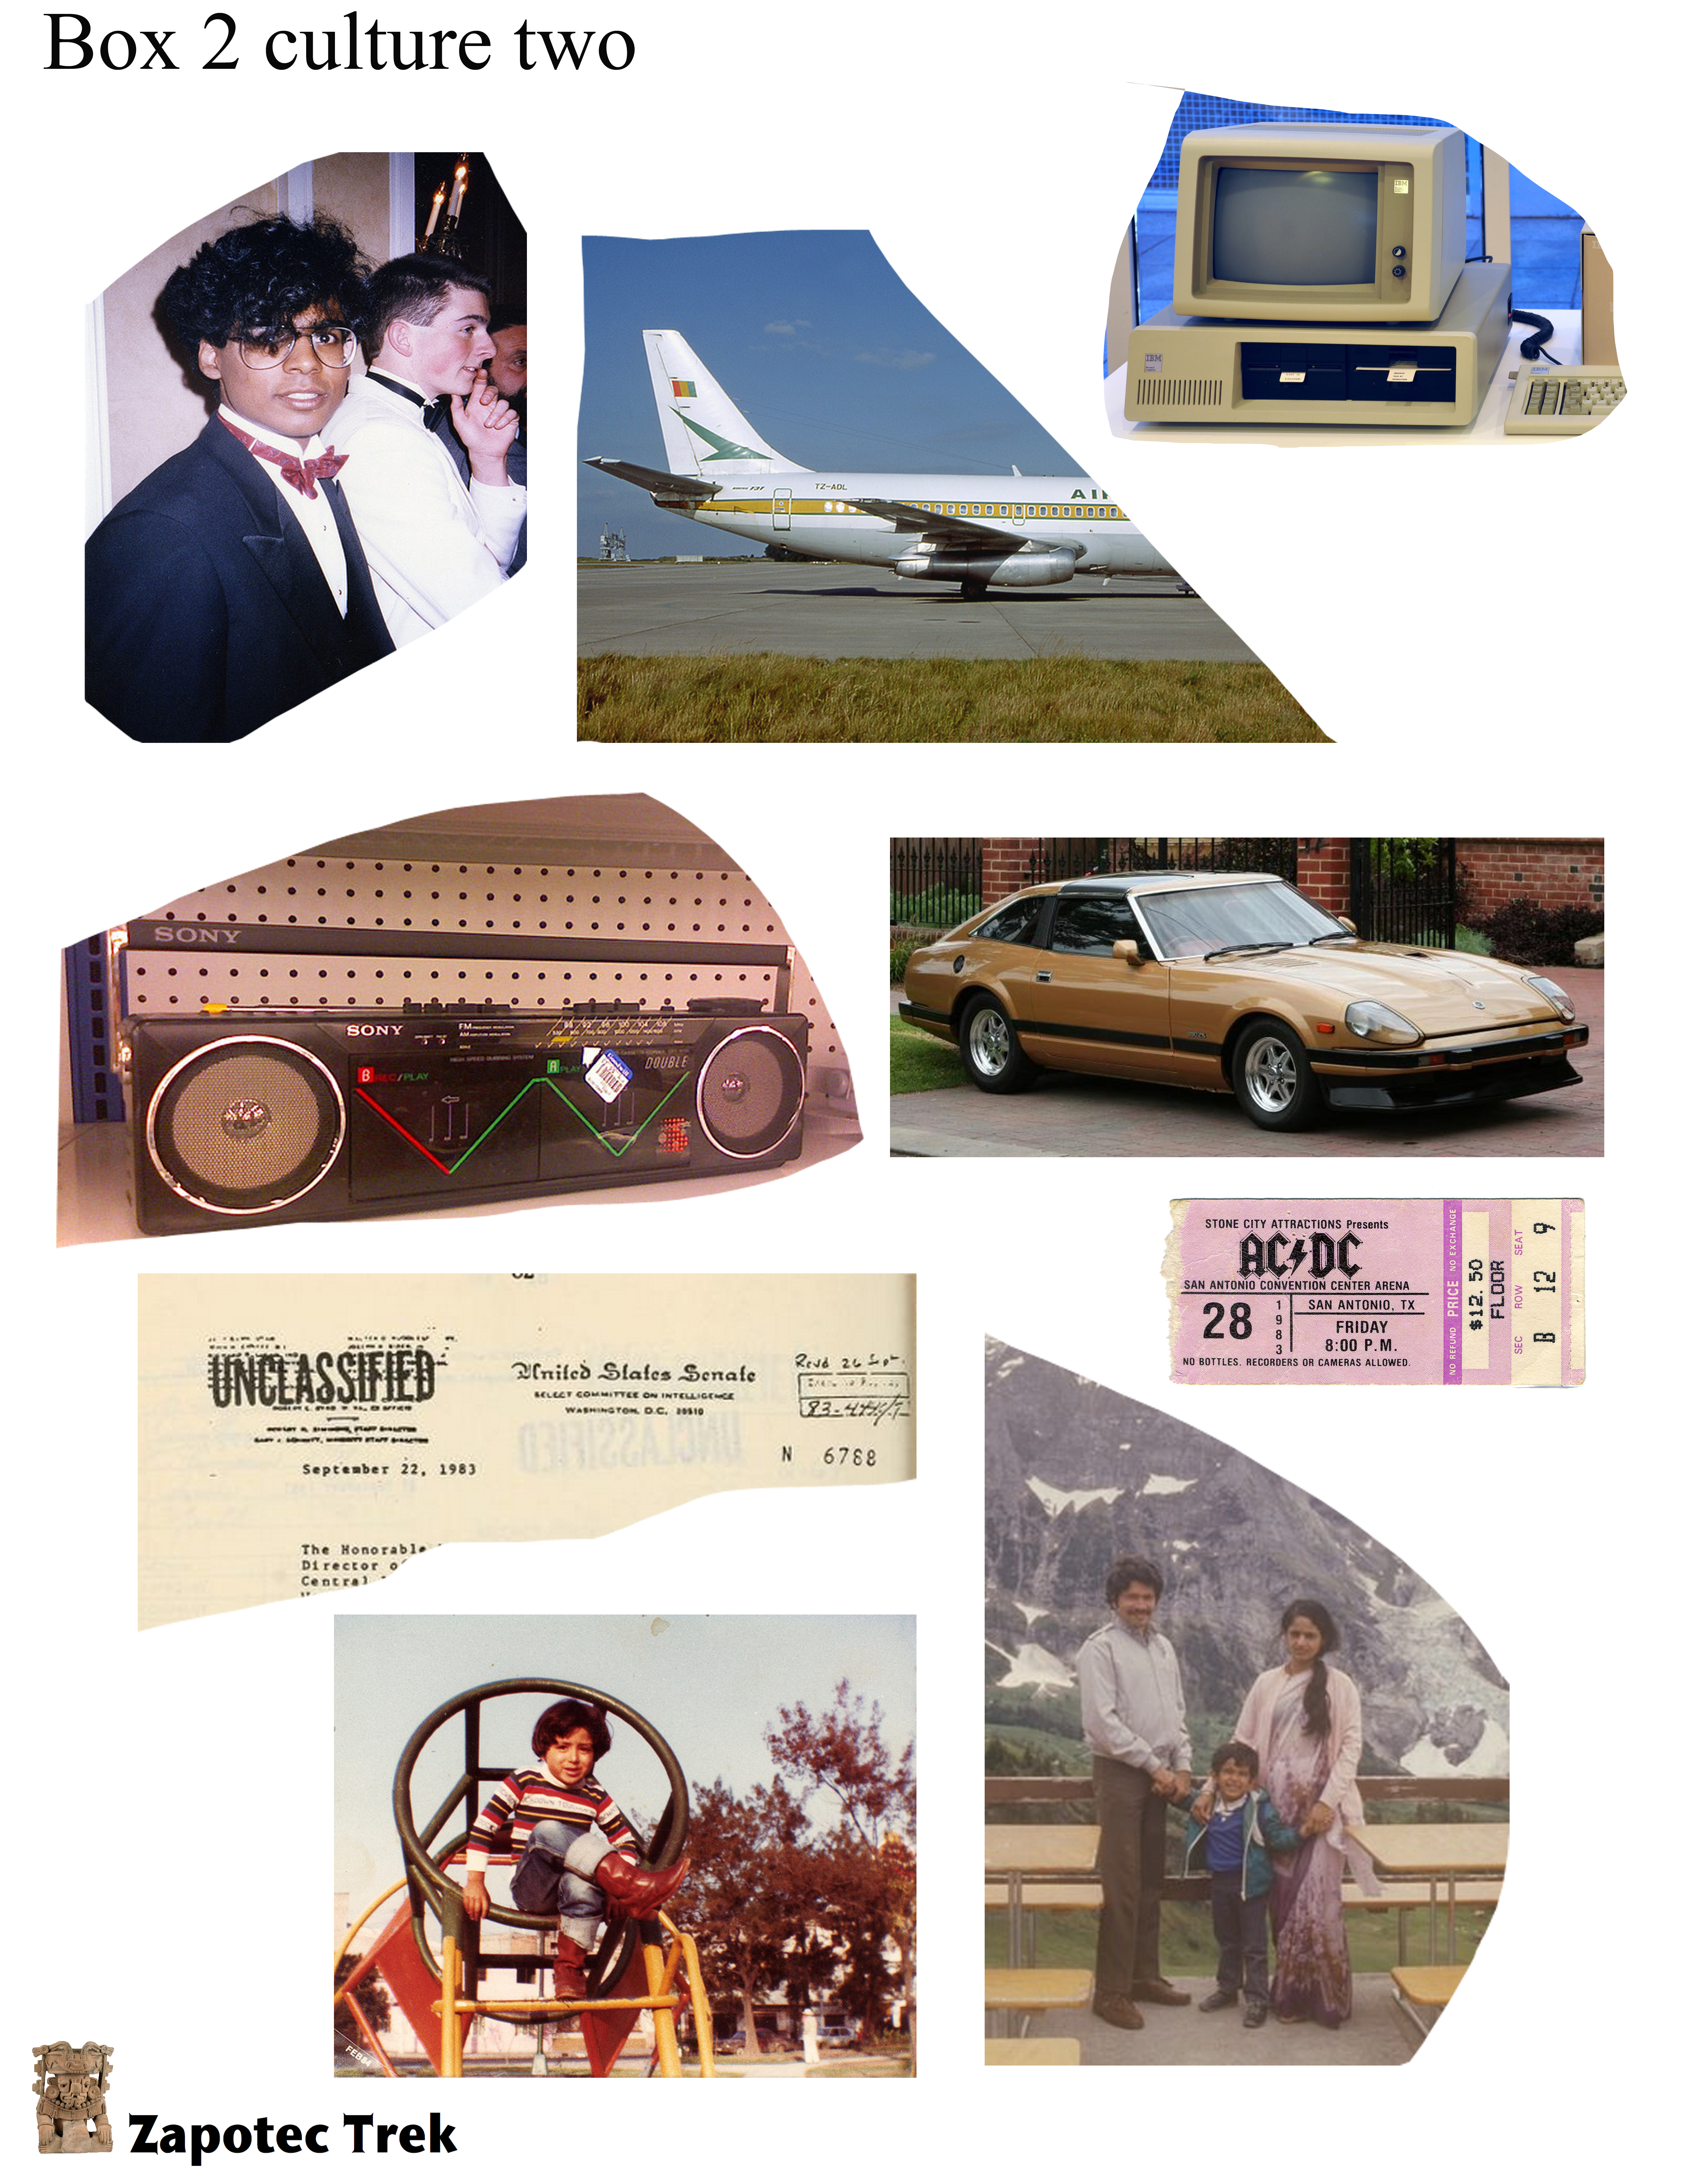
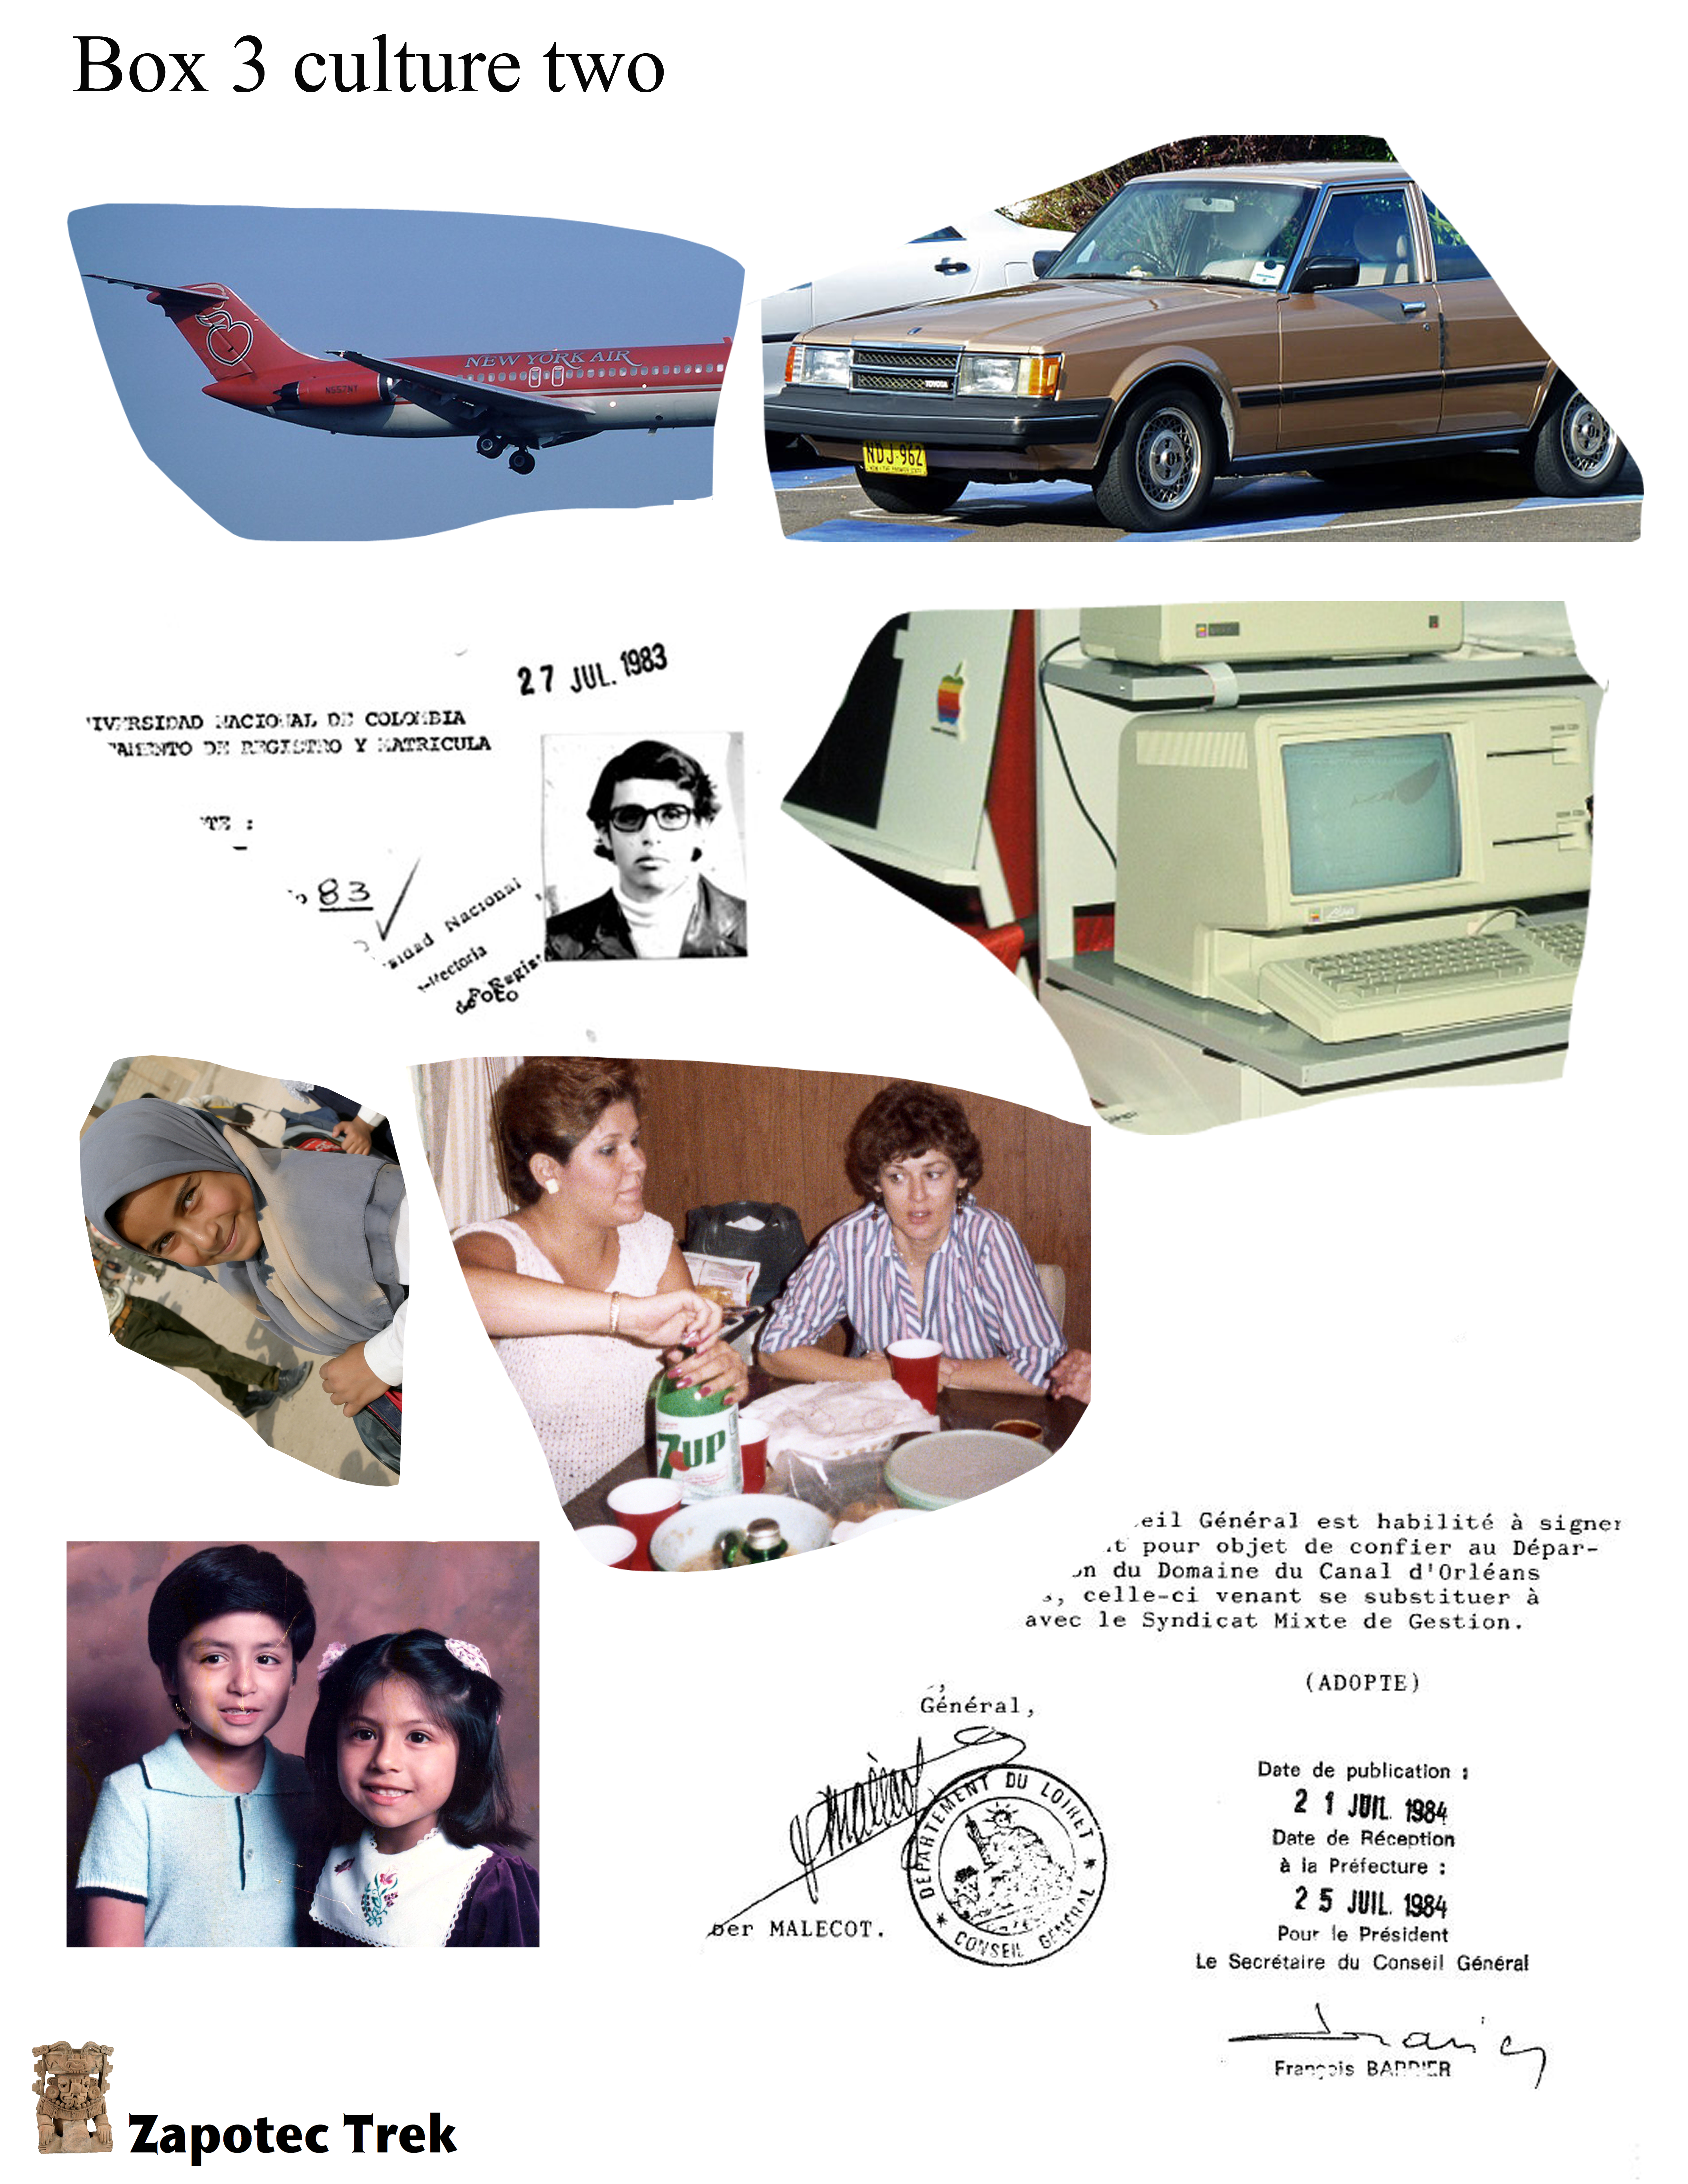
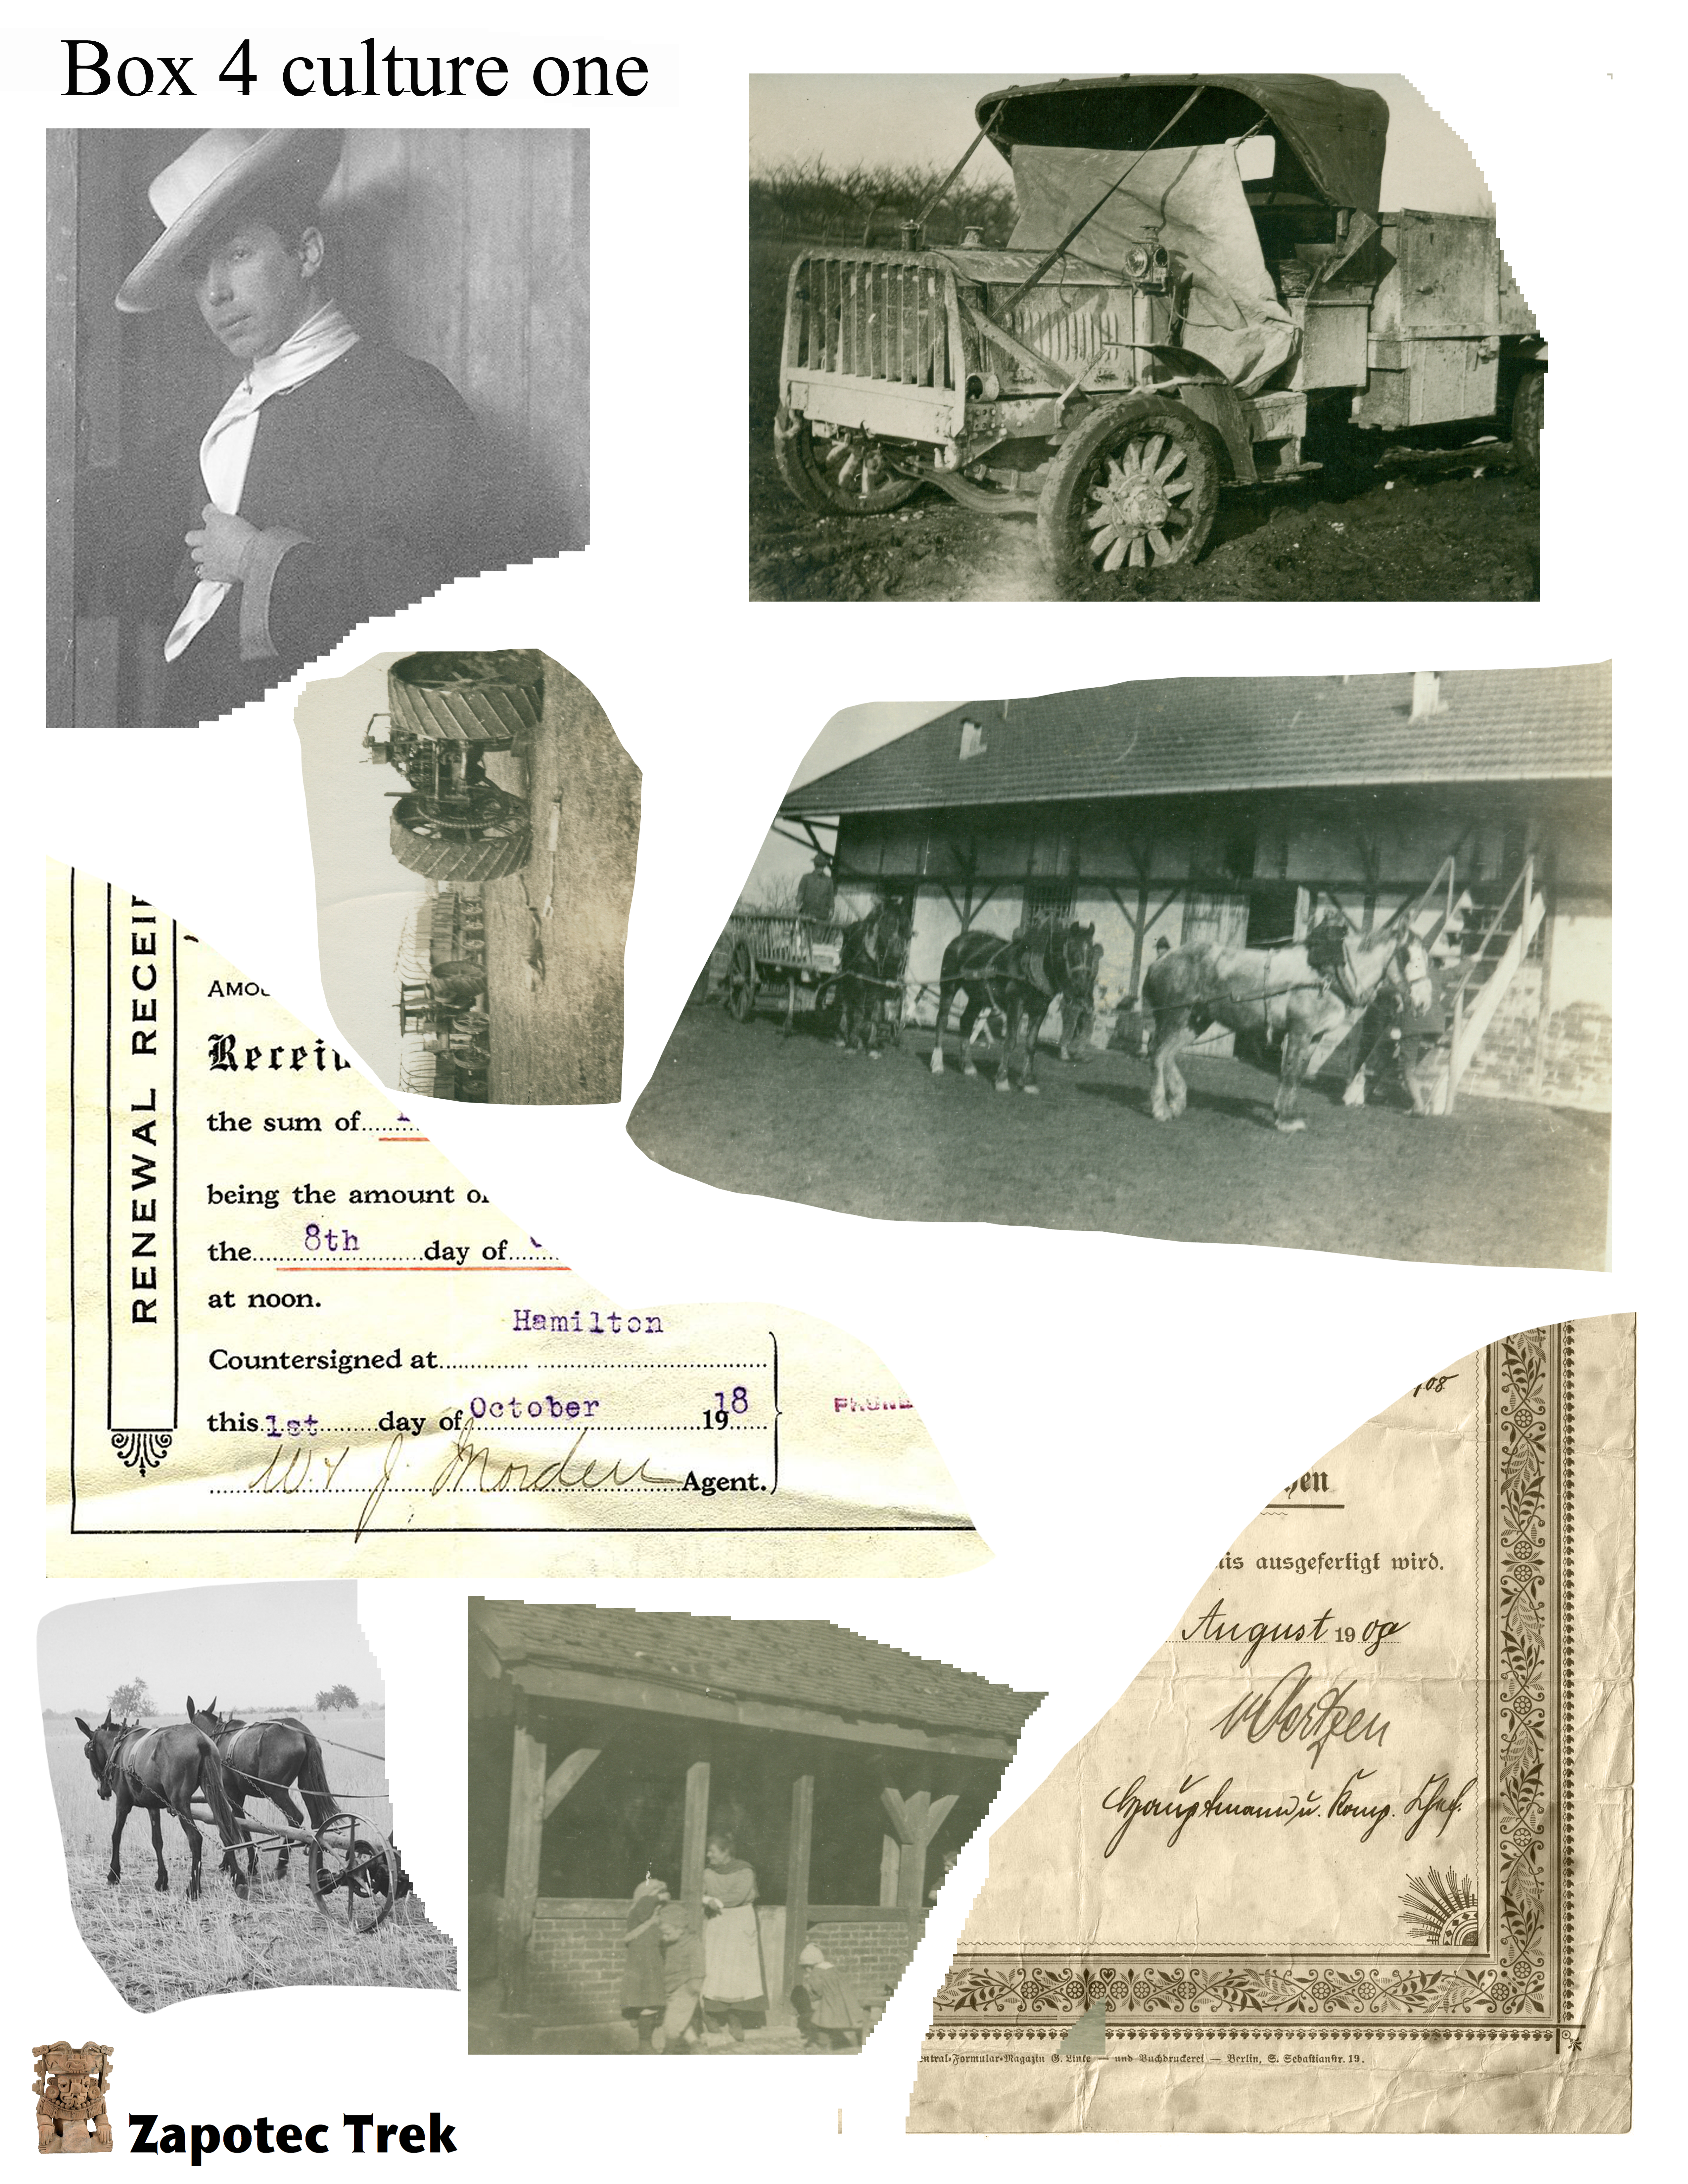
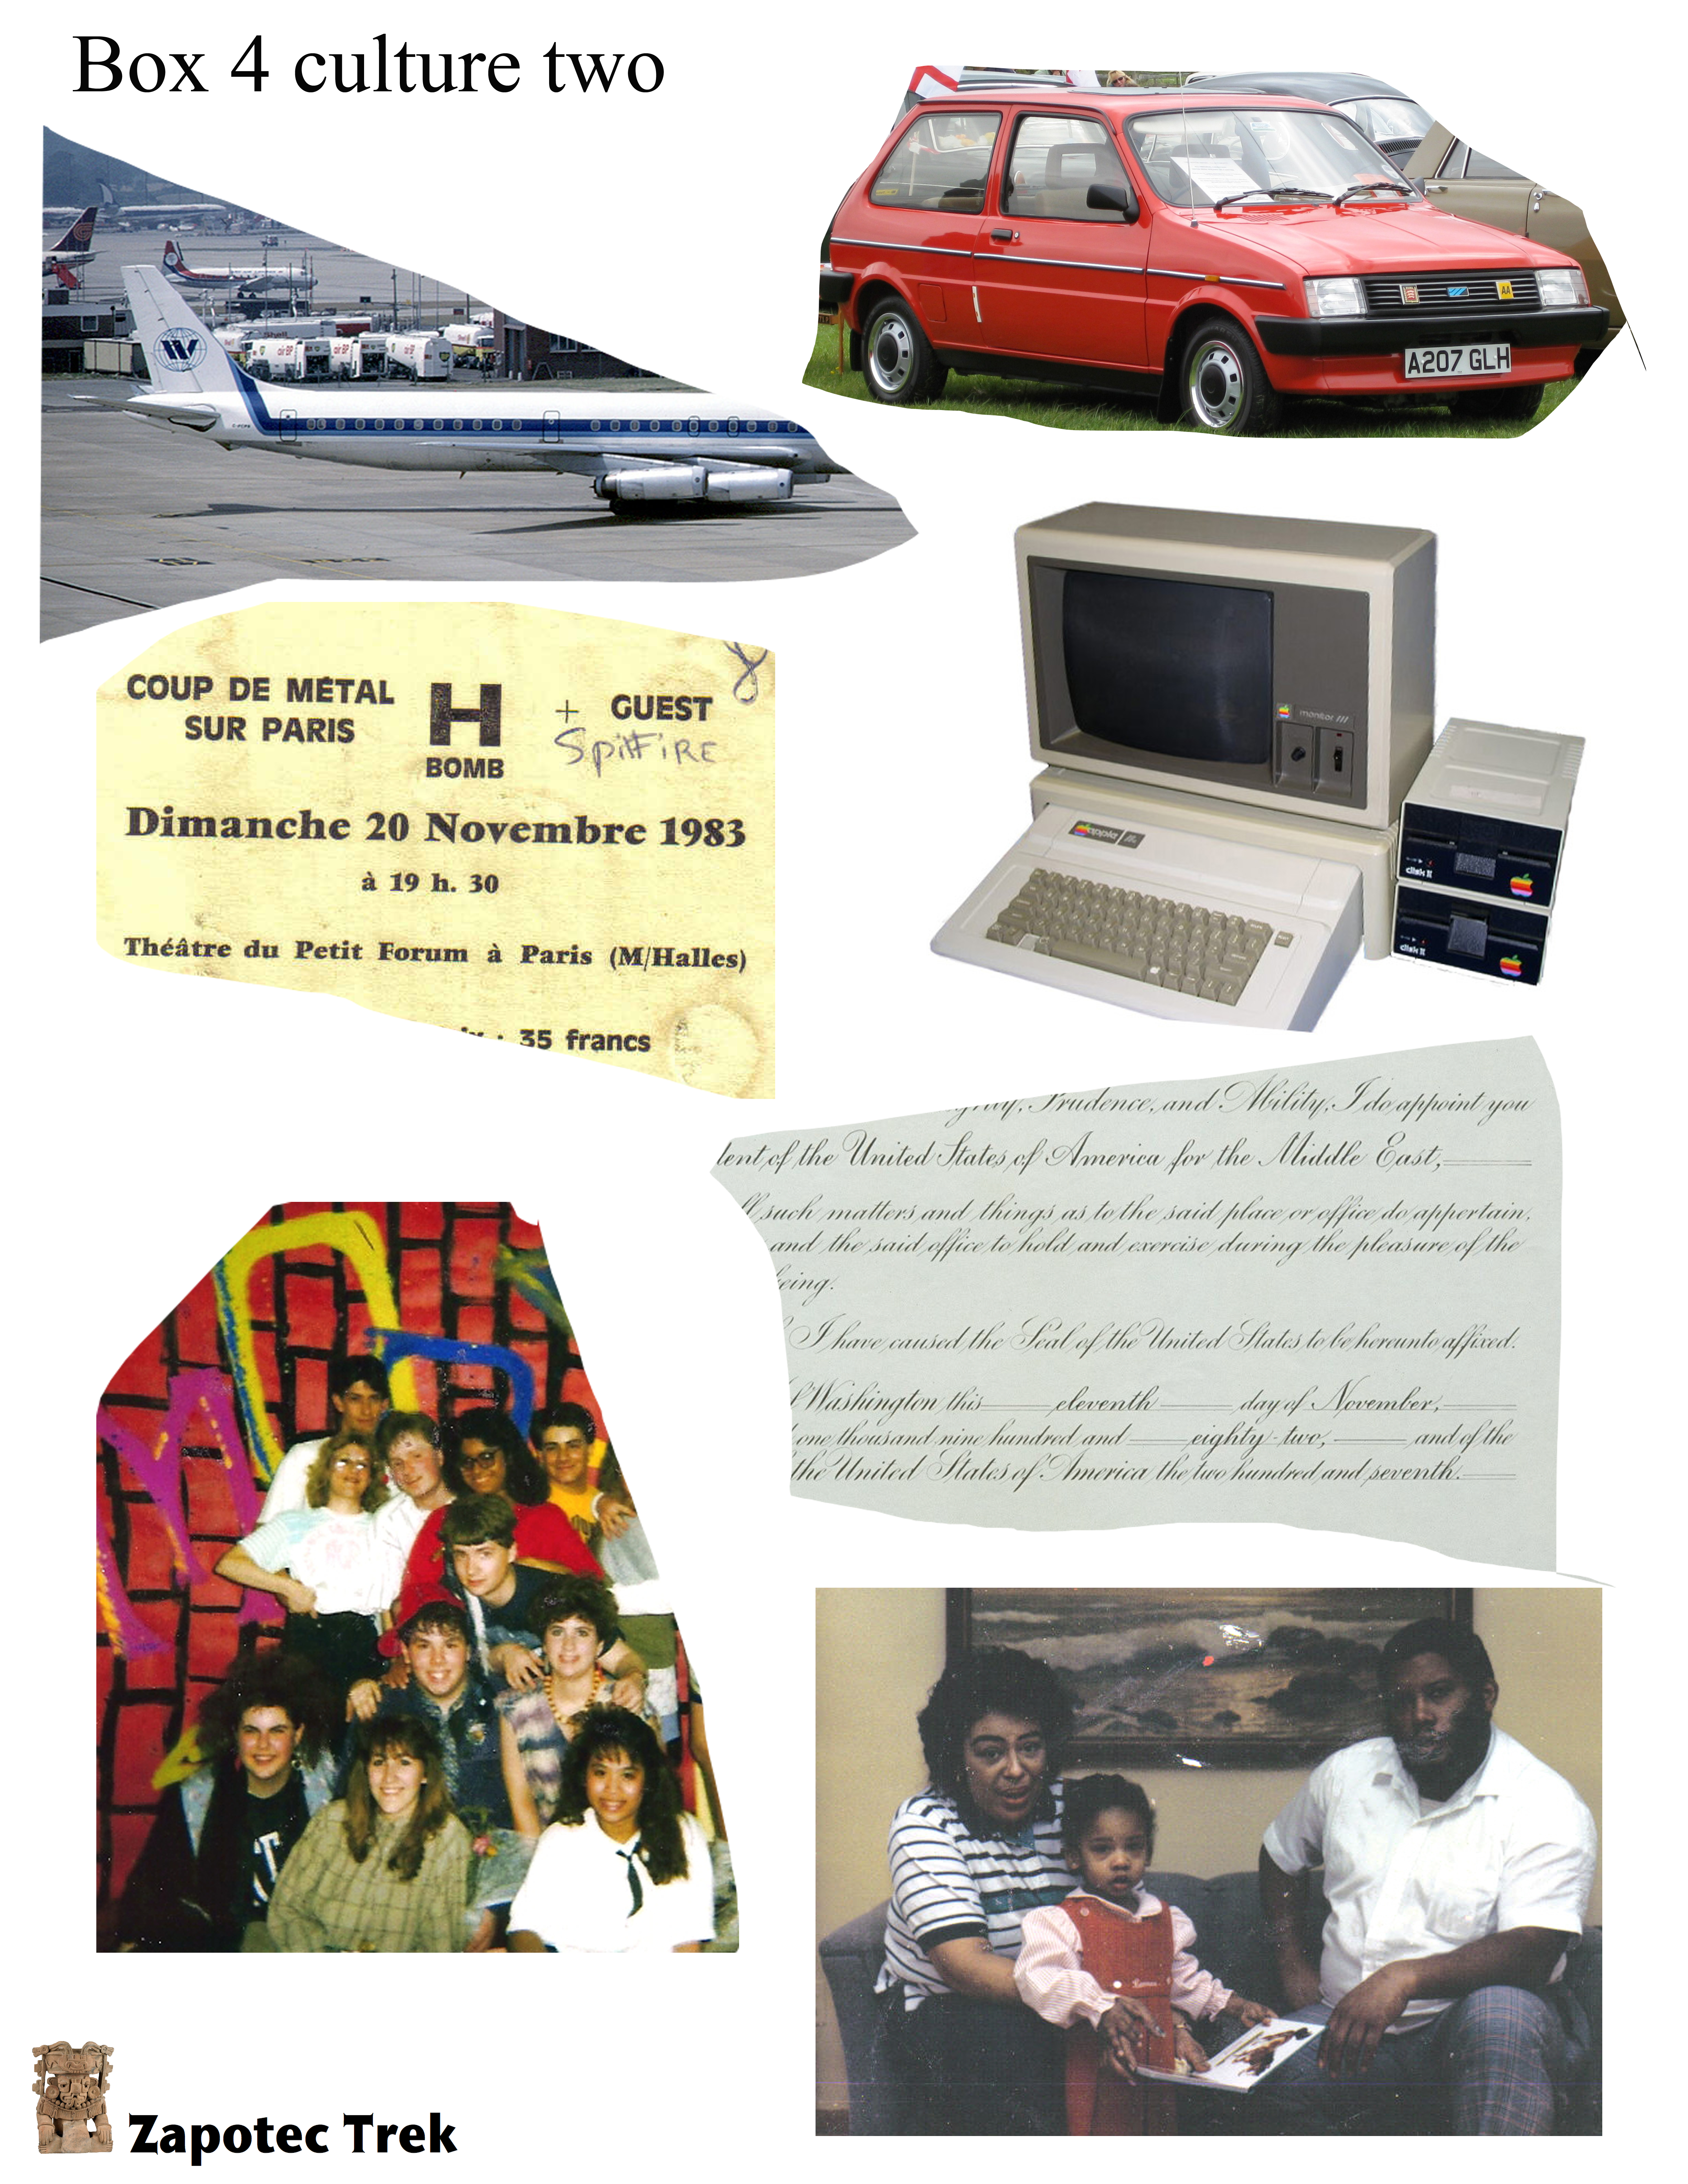
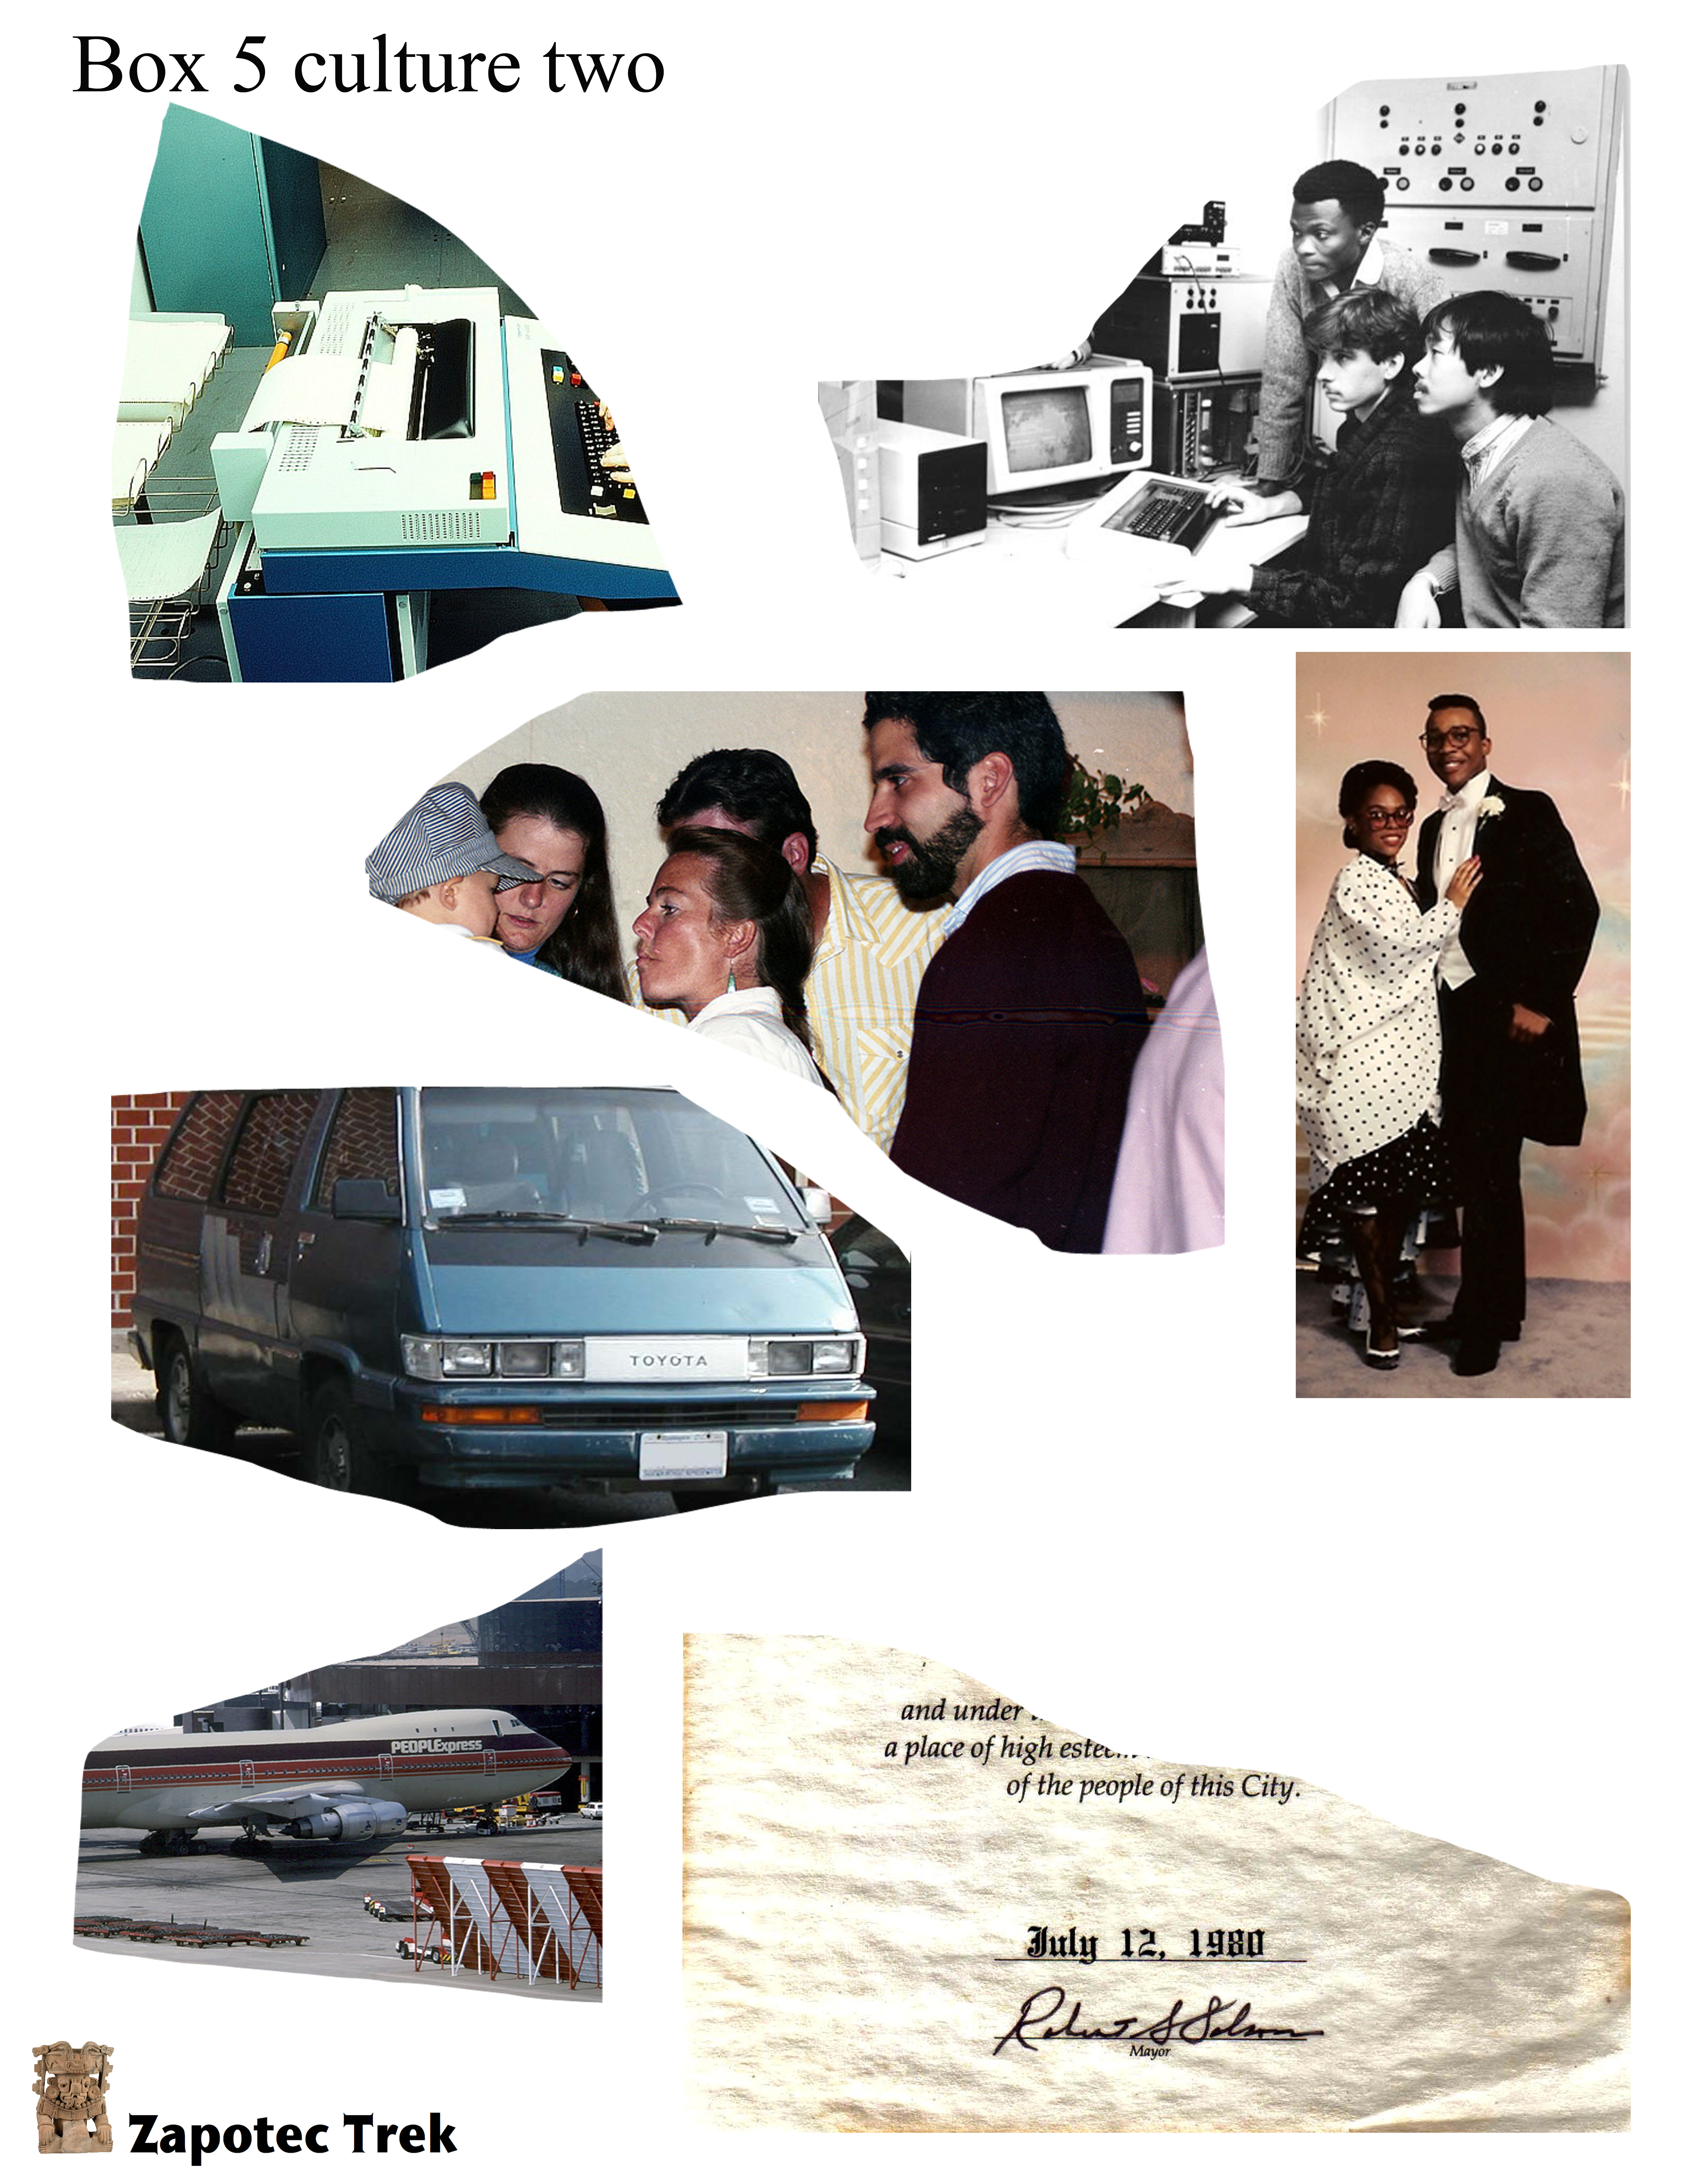
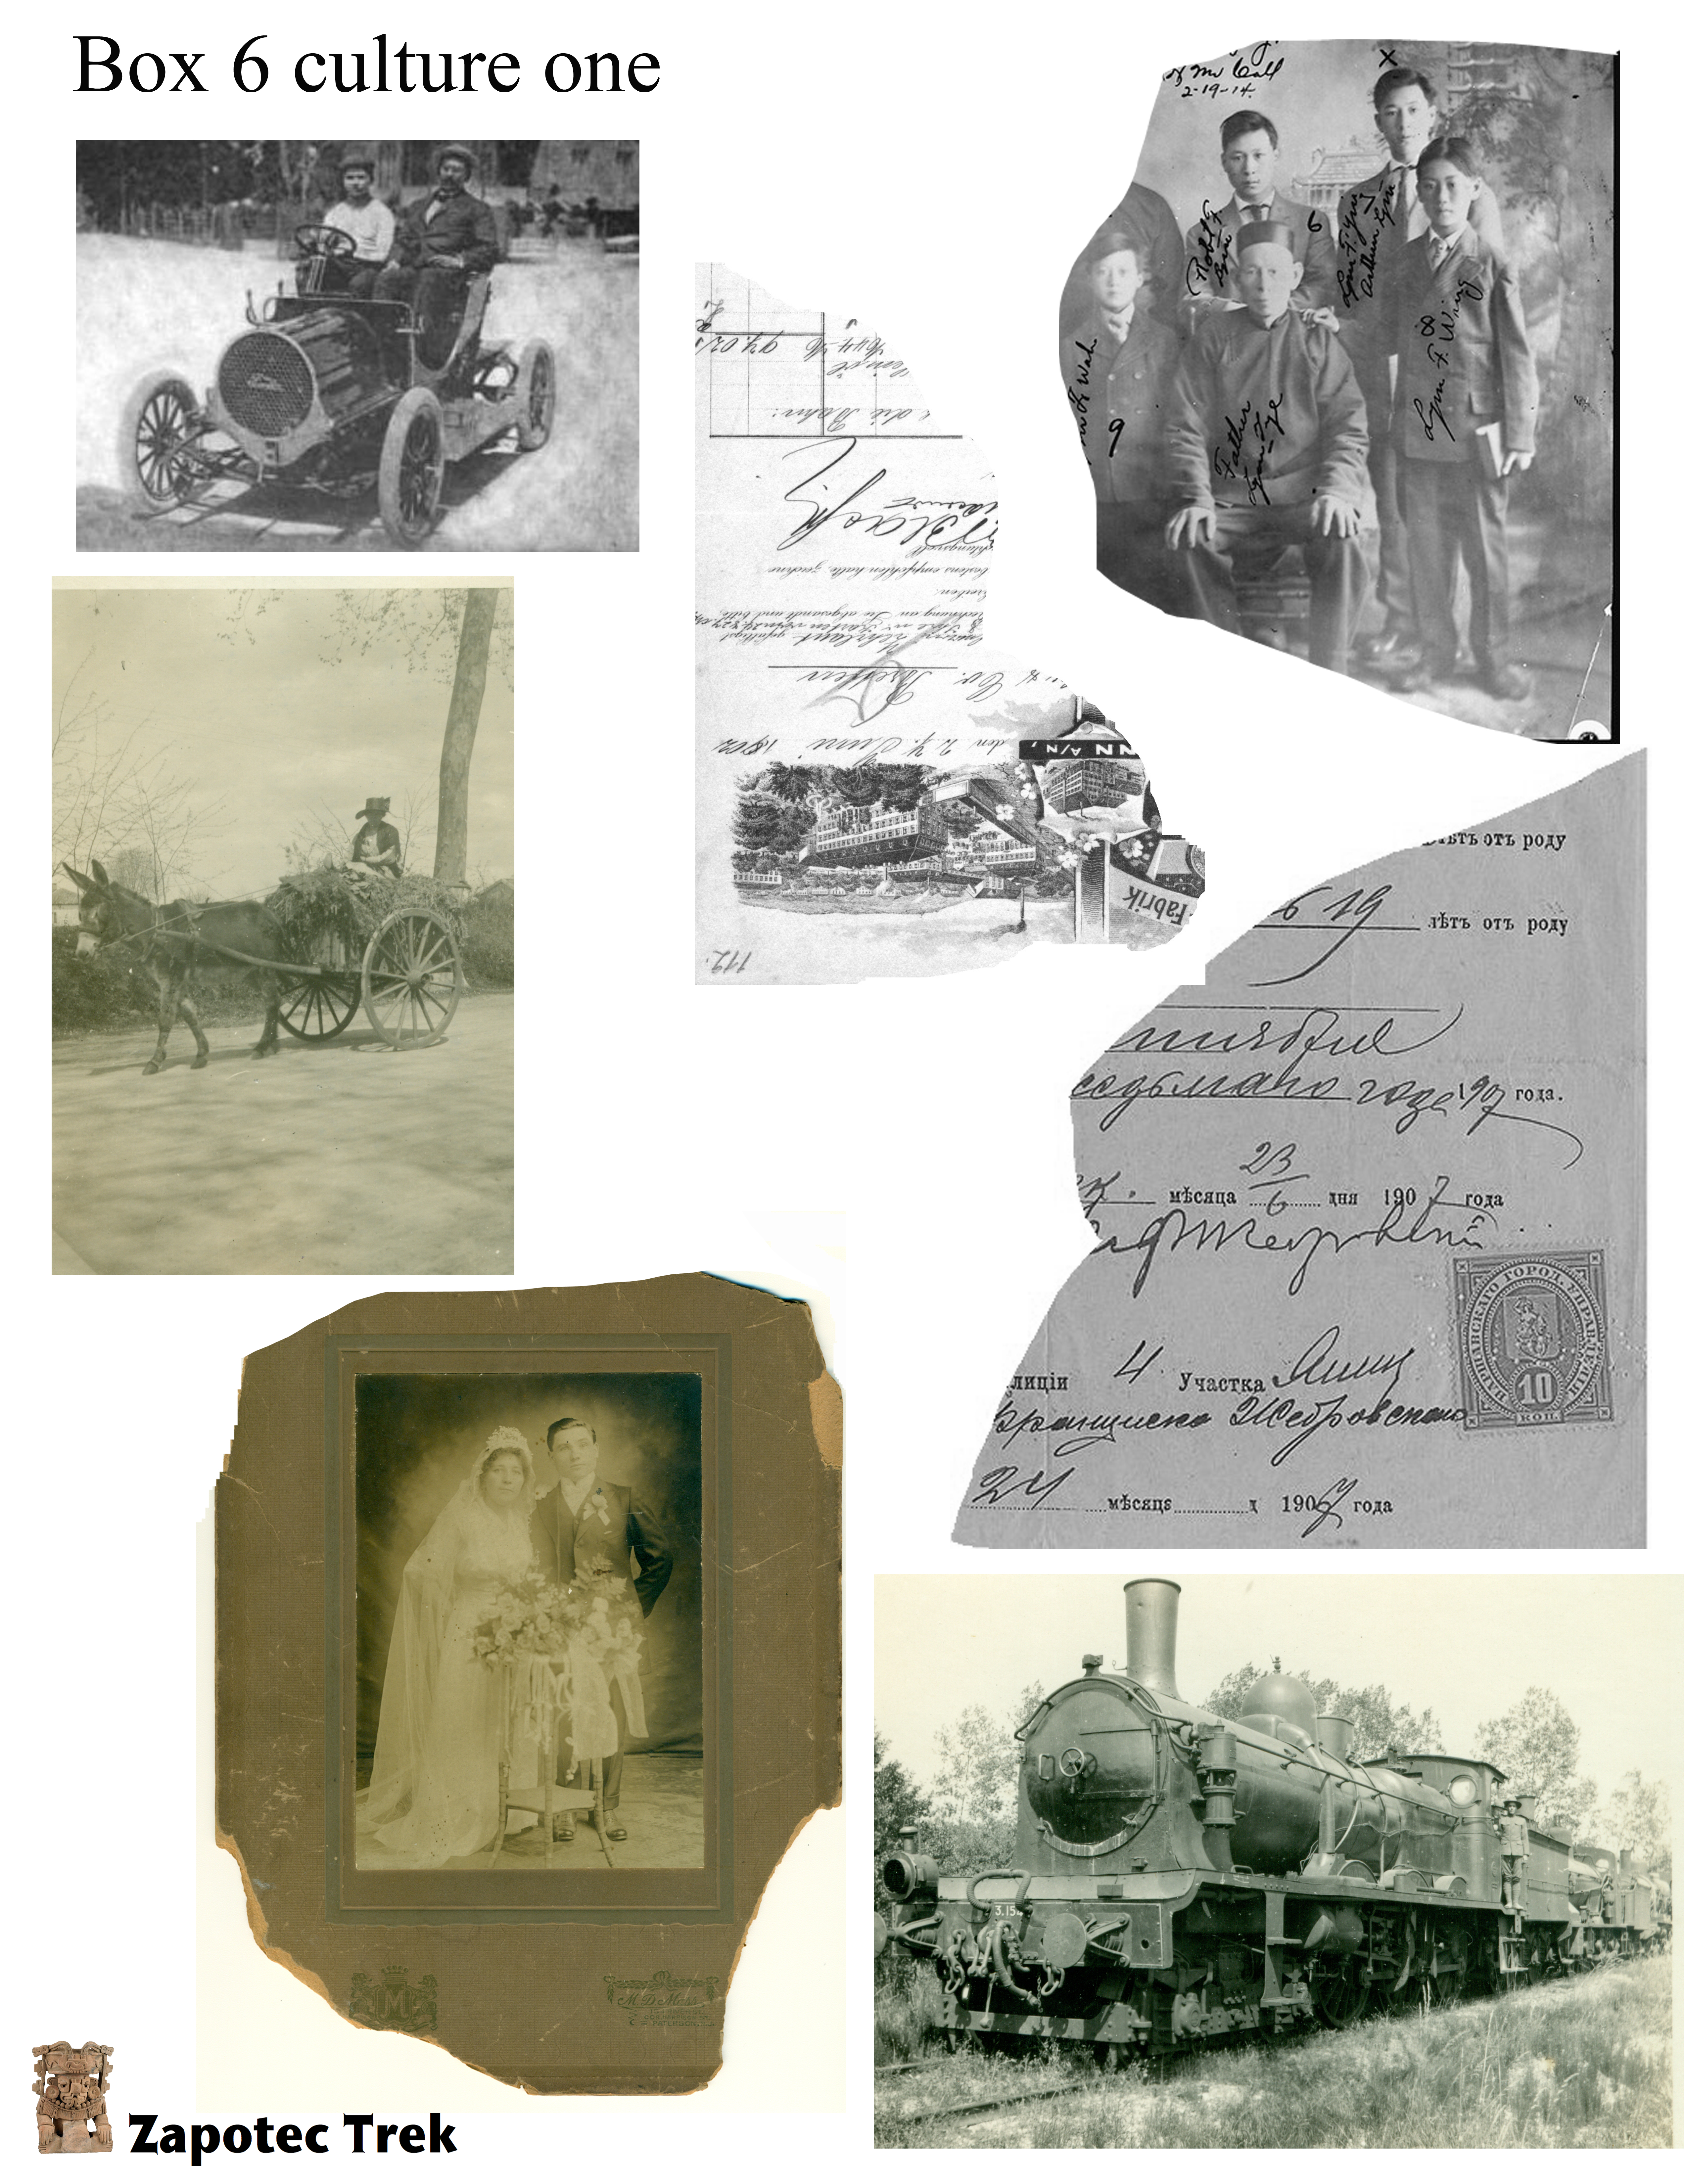
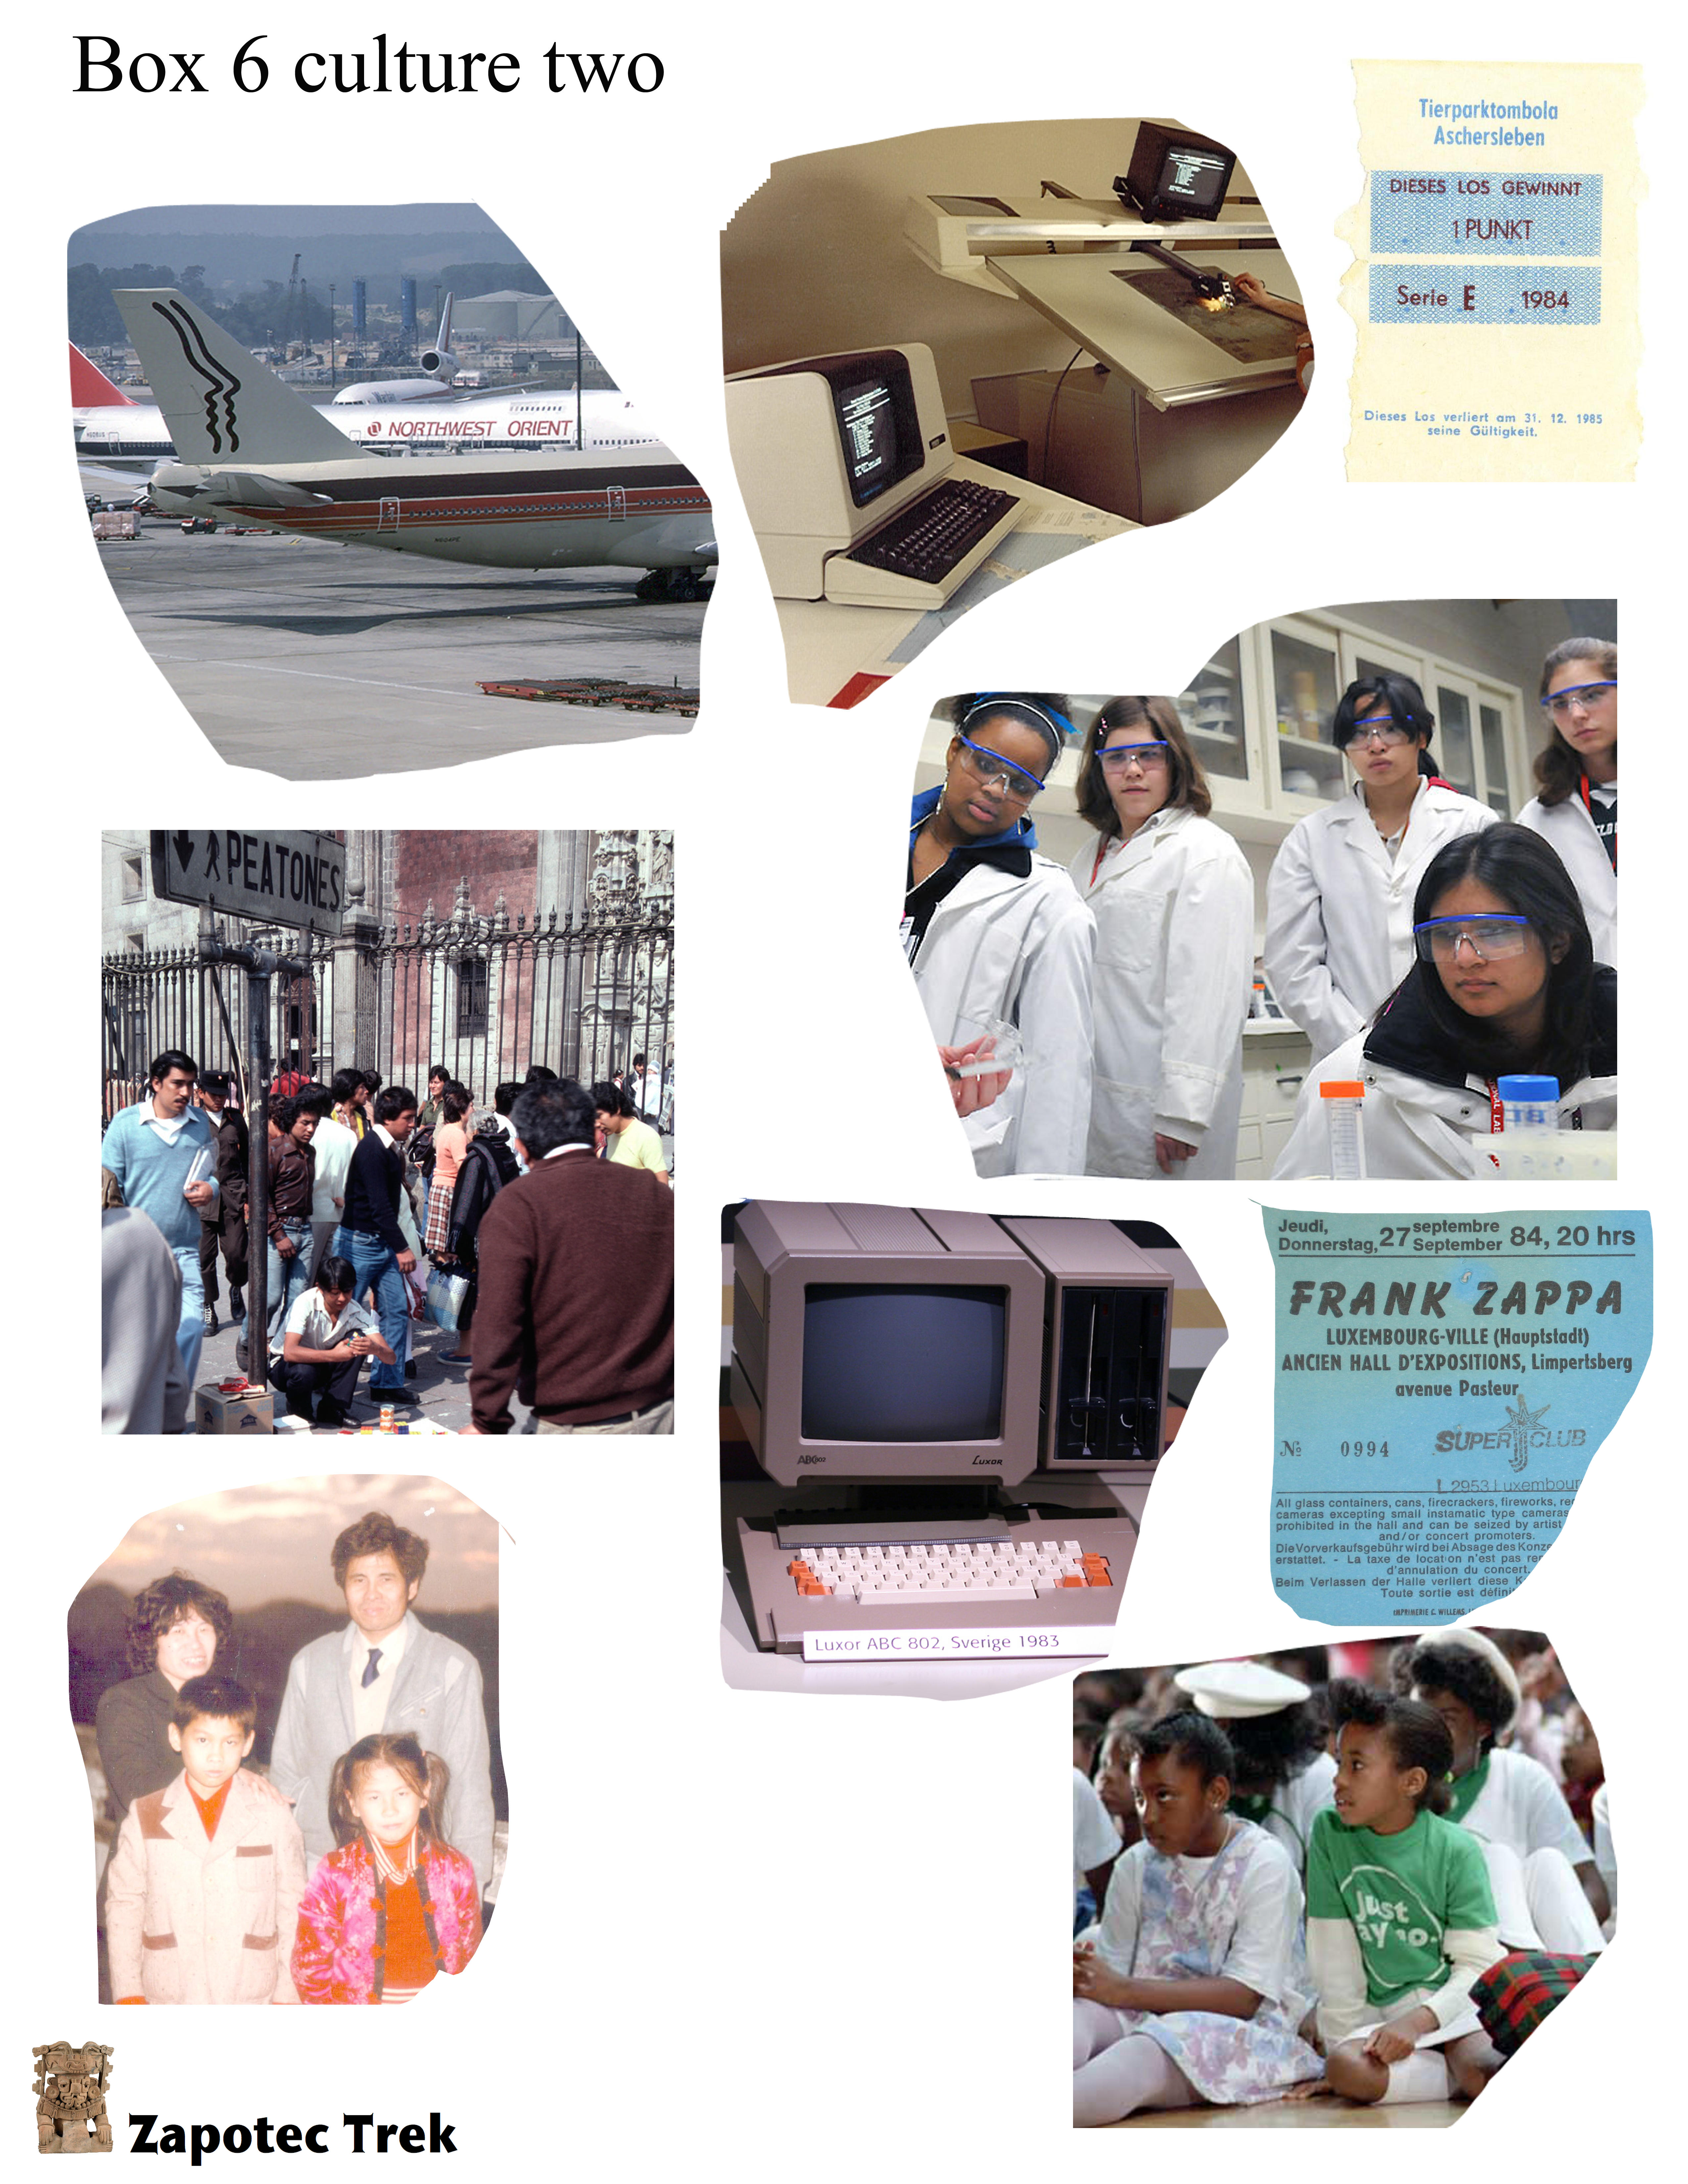
"Artifacts" - groups of photos from two different time-periods (pdf files below)
Small sticky note pads (optional)
Large paper for organizing and presenting artifacts
tape for each team
Recording paper for each team
Field notebook (pdf files below) - you should make 2 or 3 inside pages folded and stapled inside the cover page.
Preparation of Materials:
Layering the boxes:
Cut out (or rip) the photos for each box, keeping the cultures separate.
Rip up the tissue/construction paper so that you can layer it in the boxes.
The bottom layer will contain the oldest pictures and the darkest colored paper (I used black on the bottom and brown on the top)
Alternate layers of paper with layers of 2 or 3 artifacts (photos).
Finish the top with a layer of paper, so students will not see the artifacts until they start "digging."
Vocabulary:
Archaeology
Survey
Excavation
Dig site
Artifact
Evidence
Activities
Students will work in teams of 4 (ideally) or 5 students, depending on the size of the class. There are artifact pages for 6 different team boxes. Divide class before activity begins.
Begin by asking students to think-pair-share about archaeology. (If you don't use Think-Pair-Share in your classroom, Click here to read about this cooperative learning structure.)
View Video:
Give students the note-taking page "Put Yourself in an Archaeologist's Boots" before showing the video "What is Archaeology" (in the Student Activities menu of this website) and ask them to think about the questions and note a few things in each category while watching the video.
If you do not have access to a projector, you can have students watch the video on classroom computers, alternating with other activities.
Follow video viewing with a class discussion. Use a K-W-L chart to record information. Ask students what tasks they saw the archaeologists doing (and what they thought they would like vs. what they would find challenging). Ask for some of the vocabulary words they heard specific to the field or discipline of archaeology. Ask for definitions of the words: archaeology, surveying, excavation, artifact, dig site. Add vocabulary to word bank.
Simulated Dig:
Explain that they will be working in teams as archaeologists on a “dig.” Each team will “excavate” a section of the dig site which has been transported to the classroom in boxes. Before beginning, ask them to notice the layers they are removing. They also need to work carefully to keep the artifacts in order. Describe the tools (small picks and brushes) that archaeologists use to take care of the artifacts they are digging.
Tell students that they will be presenting their observations to the class. You could provide small sticky note pads to number the artifacts, or ask students to make notations on the backs of the artifacts. Provide a large piece of paper for each team to use for organization of presentation of the artifacts.
Distribute the boxes to the teams. As the students are examining the layers and artifacts in the boxes, ask them to piece together the cultural clues they are gathering. How old is the culture? What do you notice about the people? etc. Note colors of “soil” at each layer. Have students record notes as they “dig.” (Could be a large recording sheet to present to the class.)
After students are finished excavating, have them present artifacts, organized by order of discovery and include the color of the soil with each layer. Have teams report their findings to the rest of the class.
Distribute field notebooks and ask students to reflect on the experience. Ask them to use specialized vocabulary (from the word bank) in their reflections. After a few minutes of quiet writing time, ask students to turn to a partner and share about their learning experience.
Evaluation
Evaluate student participation on Teacher Observation Rubric.
Evaluate portfolio documents on Student Portfolio Rubric.
Extension Activities
Use a Venn Diagram to compare and contrast the two cultures represented in the boxes.
Ask students to write a paragraph or an essay comparing and contrasting the two cultures they have discovered.
This is the only unit activity that requires teacher prep time. If available, you could have classroom helpers (volunteers or older students) cut out the "artifacts."
Goals/Objectives:
Students will investigate ways archaeologists and historians learn about the past.
Students will analyze artifacts.
Students will make interpretations about the lives of the people the artifacts represent.
Standards:
NCHS History Standard 7A:
- The student understands the cultures and historical developments of selected societies in such places as Africa, the Americas, Asia, and Europe and is able to compare and contrast various aspects of family life, structures, and roles in different cultures and in many eras.
- Formulate questions to focus their inquiry or analysis.
- Compare and contrast differing sets of ideas, values, personalities, behaviors, and institutions.
- Hypothesize influences of the past.
- Formulate historical questions.
- Obtain historical data.
- Interrogate historical data.
- Marshal needed knowledge of the time and place, and construct a story, explanation, or historical narrative.
Materials:
Video note-taking page
For boxes:
Small rectangular boxes - shoebox, or similar (one per team of four students)
Different colored tissue paper (tan, brown, black) or construction/butcher block paper
"Artifacts" - groups of photos from two different time-periods (pdf files below)
Small sticky note pads (optional)
Large paper for organizing and presenting artifacts
tape for each team
Recording paper for each team
Field notebook (pdf files below) - you should make 2 or 3 inside pages folded and stapled inside the cover page.
Preparation of Materials:
Layering the boxes:
Cut out (or rip) the photos for each box, keeping the cultures separate.
Rip up the tissue/construction paper so that you can layer it in the boxes.
The bottom layer will contain the oldest pictures and the darkest colored paper (I used black on the bottom and brown on the top)
Alternate layers of paper with layers of 2 or 3 artifacts (photos).
Finish the top with a layer of paper, so students will not see the artifacts until they start "digging."
Vocabulary:
Archaeology
Survey
Excavation
Dig site
Artifact
Evidence
Activities
Students will work in teams of 4 (ideally) or 5 students, depending on the size of the class. There are artifact pages for 6 different team boxes. Divide class before activity begins.
Begin by asking students to think-pair-share about archaeology. (If you don't use Think-Pair-Share in your classroom, Click here to read about this cooperative learning structure.)
View Video:
Give students the note-taking page "Put Yourself in an Archaeologist's Boots" before showing the video "What is Archaeology" (in the Student Activities menu of this website) and ask them to think about the questions and note a few things in each category while watching the video.
If you do not have access to a projector, you can have students watch the video on classroom computers, alternating with other activities.
Follow video viewing with a class discussion. Use a K-W-L chart to record information. Ask students what tasks they saw the archaeologists doing (and what they thought they would like vs. what they would find challenging). Ask for some of the vocabulary words they heard specific to the field or discipline of archaeology. Ask for definitions of the words: archaeology, surveying, excavation, artifact, dig site. Add vocabulary to word bank.
Simulated Dig:
Explain that they will be working in teams as archaeologists on a “dig.” Each team will “excavate” a section of the dig site which has been transported to the classroom in boxes. Before beginning, ask them to notice the layers they are removing. They also need to work carefully to keep the artifacts in order. Describe the tools (small picks and brushes) that archaeologists use to take care of the artifacts they are digging.
Tell students that they will be presenting their observations to the class. You could provide small sticky note pads to number the artifacts, or ask students to make notations on the backs of the artifacts. Provide a large piece of paper for each team to use for organization of presentation of the artifacts.
Distribute the boxes to the teams. As the students are examining the layers and artifacts in the boxes, ask them to piece together the cultural clues they are gathering. How old is the culture? What do you notice about the people? etc. Note colors of “soil” at each layer. Have students record notes as they “dig.” (Could be a large recording sheet to present to the class.)
After students are finished excavating, have them present artifacts, organized by order of discovery and include the color of the soil with each layer. Have teams report their findings to the rest of the class.
Distribute field notebooks and ask students to reflect on the experience. Ask them to use specialized vocabulary (from the word bank) in their reflections. After a few minutes of quiet writing time, ask students to turn to a partner and share about their learning experience.
Evaluation
Evaluate student participation on Teacher Observation Rubric.
Evaluate portfolio documents on Student Portfolio Rubric.
Extension Activities
Use a Venn Diagram to compare and contrast the two cultures represented in the boxes.
Ask students to write a paragraph or an essay comparing and contrasting the two cultures they have discovered.
Files for downloading:
Video notes: Put Yourself in an Archaeologist's Boots
Video notes: Put Yourself in an Archaeologist's Boots
| archaeologist_movie_notes.pdf |
Field Notebook files
|
| ||||
Simulated Dig Box files
|
|
|
| ||||||||
|
|
|
| ||||||||
|
|
|
| ||||||||